Big arms. You want them. And we're talking about biceps and triceps here – not "fatceps." No one cares what your arm measures when it's coated in three inches of fat. If you don't have a single visible vein wrapping itself around your biceps then you've got work to do. Here's how to do it.
To build a bigger anything, you have to grow as a whole. You can build in areas to some degree without major increases in bodyweight, but if you're talking about putting two inches on your arms, then your whole body has to grow.
For every inch you want to add to your arms, you're probably looking at 10-15 pounds of lean mass. The larger you get, the greater that figure becomes. So a guy trying to go from 16 to 17 inch arms may need to gain 15 pounds. But a guy trying to go from 19 to 21 inch arms may need to gain 25-30 pounds.
This is the reason why getting that elusive 20 inch arm measurement is so difficult. Unless you're genetically predisposed to having huge arms, you have to get big overall to reach such monstrous proportions. No one is walking around at 160 pounds with 20 inch cannons. That's why this arm training program below contains leg and back work.
Most free weight movements offer peak resistance at different areas throughout the range of motion. Because the biceps are made up of two heads with the brachialis sitting underneath, depending on wrist/elbow position and the resistance curve, each of those areas will end up with a bit more tension during certain exercises.
So while the term "isolate" isn't exactly proper, you can direct a greater amount of tension to certain areas. This is how you get more complete development. In the program here, you'll do three movements for triceps and three for biceps using mostly barbells and dumbbells, one movement for each peak of the resistance curve:
- At the start or first quarter of the range of motion.
- At the mid-point of the movement.
- At the finishing point of the exercise.
Before your next arm session, follow this simple rule to keep your elbows from getting angry: Biceps before triceps, and biceps and triceps together.
Do your biceps work first. This will pull blood around the elbow and give somewhat of a "cushion" for the triceps work after. Also, always work arms together on the same day. I've split arms up a number of times but have always made the best progress when working biceps and triceps together.
1. Switch-Grip Barbell Curls
Think midrange on the resistance curve. You'll do these in a way to emphasize a bit more tension on the short head at first, then switch grips to bring the whole family into play.

Start with a wide grip on the bar, elbows tucked in to your sides. To get the short head more involved, squeeze your elbows into your sides while supinating with your hands very hard against the bar. Literally try to bend the bar in half while you perform the curl. Do 5 reps. Then move your grip to shoulder width and do 5 more reps, keeping your elbows tucked into your sides. Do 5 sets of 10 using the same weight for all 5 sets.
Choose a weight that allows you to concentrate on achieving a very hard contraction at the top position, not a weight you heave up.
2. Incline Dumbbell Curls to Standing Hammer Curls
This is our starting resistance curve exercise. The first quarter-range of motion is usually where the peak is. This emphasizes the long head and brachialis.


Exercises like this load the muscle in a lengthened or stretched position and offer tremendous potential for growth. When you do incline dumbbell curls with the palms facing forwards rather than facing each other, the biceps are put into a much more lengthened position, stretching the long head significantly. There will be a tremendous amount of tension at the initiation of the movement.
Pick a weight that allows you to hit 10 reps in good form. Have a seat on a bench with a steep incline. Sit back and do 10 reps, then immediately stand up and do dumbbell hammer curls. Do as many hammer curls as possible once standing. Complete 4 sets of 10 reps with the same weight, where the fourth set is difficult to complete.
3. Prone Incline Concentration Curls

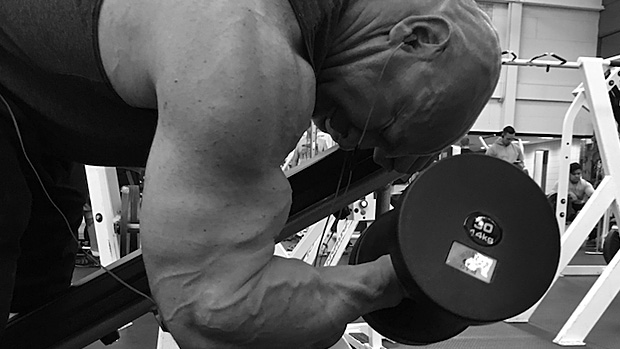
This hits the long head of the biceps – the finishing resistance curve. Lie facedown on an incline bench with the working arm hanging straight down. Curl and really squeeze the biceps at the top of the movement where the resistance curve will be at a peak. Once at the top, lift the elbow slightly to further shorten the biceps and create a harder contraction. (One of the functions of the biceps is shoulder flexion.) Control the dumbbell on the eccentric or lowering portion.
Only use one arm at a time. You'll find it easier to concentrate on the contraction. Three sets of 8-rep drop sets is the finisher here. Get a set of dumbbells that you can only curl 8 times. Do a set of 8 to failure, then immediately grab a lighter weight that allows another 8 reps to failure, then repeat that one more time. Rest for two or three minutes and repeat for two more rounds.
The triceps have three heads, hence the prefix. Ever see a guy from behind whose triceps look like Christmas hams sitting on the back of his arm? That's great long and medial head development. Ever see a guy from the front whose triceps bulge out to the side giving his arm that awesome 3D look? That's great lateral head development.
And just like the biceps, depending on the exercise and how it's performed, certain heads will receive more tension than others. Sure, all heads of the triceps will be "involved" in any movement performed to activate them, but what we're talking about here is directing the greatest amount of tension to a particular area.
1. Knuckles-Down Swivel Bar Pushdowns

This hits the lateral and medial head – the end resistance curve. You can also do these with a rope and accentuate pronation at the bottom by concentrating on forcing your hands out, but you'll get a much harder contraction by using a simple trick.
Turn your hands down at the bottom of the movement as hard as possible, trying to get your knuckles to face the floor. They may not end up actually facing the floor, but trying to get them to do so will cause a severe contraction. Do 5 sets of 12 reps using the same weight for all 5 sets.
2. Reverse-Grip Smith Machine Press

This hits the lateral and medial head – the mid-range resistance curve. With reverse-grip benching you may find holding the bar problematic at times. You'll end up concentrating too much on just moving the weight – trying to stabilizing rather than loading the triceps. Give the smith machine a go and you won't have to worry about stabilizing. You'll be able to tuck the elbows in hard and load the shit out of your triceps, especially on the eccentric portion of the movement.
Don't bring the bar all the way down to your chest. Lower it to a few inches above to make sure the triceps are under tremendous tension the entire time. After 3-4 warm-up sets, do 3-4 heavy sets of 6-8 reps, working up to a top heavy set then reducing weight each set afterwards.
3. PJR Pullovers
This works the long head – the starting resistance curve. Adduction of the arm is carried out by the long head of the triceps, which works in conjunction with the lats.

No movement works the long head of the triceps as effectively as this one. The key point here is to drop the dumbbell down as soon as it clears your forehead, then extend into the concentric portion using the triceps.
Do 1-2 top sets. Stay a bit lighter and get more reps in with it rather than trying to go ultra heavy. Because of the degree of stretch involved, going too heavy could lead to injury. Stick with 1-2 sets of between 15-30 reps to finish off the triceps.
Going into the gym and doing arms all the time won't cut it. Arm size will be limited by overall body size, remember? So do leg and back work, but keep things simple. This will look easy on paper and really 'effin hard to do.
Legs & Back: Workout 1
Squat
Do 2 sets of 20-rep squats. Take as much time as you need between those two sets: up to about 10 minutes between sets 1 and 2. Pick a weight you think you can do for 20. If you get 18, stay with it until you can get 20. If you do more than 20, add weight. Add weight as often as possible while keeping good form.
Deficit Stiff-Legged Deadlift
Do one all-out set of 15 reps. These are full ROM, starting from the floor, with a soft bend in the knee. Your lats, traps, glutes, hamstrings, and anything else you can name back there will be completely trashed after these. It's just one set, but you need to make that one set count.
Legs & Back: Workout 2
Walking Lunge
For the first 15 minutes, do walking lunges. Bodyweight only. Just tally up how many lunges you're able to get in 15 minutes and try to beat that total every week.
Curl-Grip Chin-Up
Do them for 15 minutes. Once again, bodyweight only, and tally up how many you were able to do. Then beat that number every week. If you're one of those 155-pound guys that can do 4,000 chin-ups in one set, then add enough weight so that the first set brings you down to around 15 reps.
Day 1 – Legs and Back
| Exercise | Sets | Reps | |
|---|---|---|---|
| A | Squat | 2 | 20 |
| B | Stiff-Legged Deadlift | 1 | 15 |
Day 2 – Arms
| Exercise | Sets | Reps | |
|---|---|---|---|
| A | Switch-Grip Barbell Curl | 5 | 10 |
| B1 | Incline Dumbbell | 4 | 10 |
| B2 | Hammer Curl | 4 | AMAP |
| C | Prone Incline One-Arm Concentration Curl | 3 | 8 |
| Use drop sets. Do 8 reps, grab lighter weight do 8 reps, grab lighter weight do 8 reps. | |||
| C | Knuckle-Down Swivel Bar Pushdown | 5 | 12 |
| D | Smith Machine Reverse Grip Bench Press | 3-4 | 6-8 |
| E | PJR Pullover | 1-2 | 15-30 |
Day 3 – Off
Day 4 – Legs and Back
| Exercise | Sets | Reps | |
|---|---|---|---|
| A | Lunge * | 15 min. | Tally |
| B | Chin-up/Pull-Up (any variation) * | 15 min. | Tally |
* 15 minutes tallying up the total number of reps.

