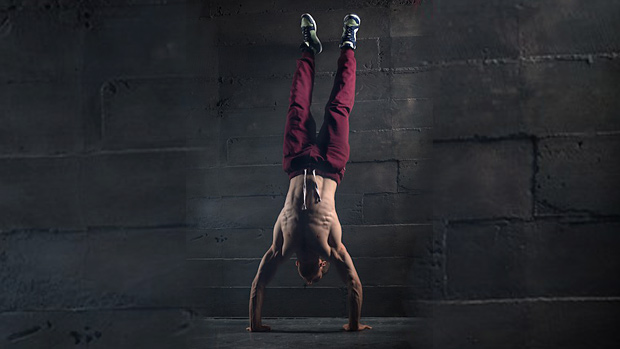
The handstand is pure fun, and it can have some serious benefits for your core and shoulders. Unfortunately, a lot of people really screw it up. Here's how to get it right.
Note: If you don't have healthy, mobile shoulders and a strong core you shouldn't be attempting the handstand. Get your shoulders fixed up first. Read this: The Strongman's Guide to Healthy Shoulders.
Building from the Ground Up
Start slow. First get comfortable balancing on your hands in a position that's less intimidating to fall from. A precursor to the handstand is the yoga pose called the crow. This gets you comfortable putting weight on your hands and learning to balance without the risk of falling on your head. Face planting is a definite possibility with this one though, so when you go to shift your weight, be sure to keep your head up.
The Crow

- Squat down and place your palms approximately shoulder-width apart on the floor. Weight should be on the balls of the feet.
- Wrap your knees around your triceps and squeeze your arms with your legs.
- Engage your core by pulling your abdomen towards your spine.
- Shift your weight onto your hands, keeping your head up.
- Bring your feet together.
Once you get comfortable at crow it's time to invert (go upside down). A great place to start is the headstand.
The Headstand
This gets you used to being upside down and prepares you for the feeling of blood rushing to your head. The tripod method is the easiest for newbies. (Before you get on your head, make sure you don't have a neck condition. Be careful.)


- Rest your head on the floor with your hands at shoulder width.
- Place your knees on top of your elbows. Make sure your elbows run parallel to each other.
- Slowly lift one leg off your knee and take your foot up in the air vertically.
- Bring the other leg on the knee up towards the leg that's lifted.
- Keep your elbows tight to assist with balance.
The Kick Up
When you first practice kicking up, begin next to a wall. Don't try to donkey kick the shit out of it. Rather, think of your leg as a long lever and try to smoothly lift the leg off the floor. Land against the wall as lightly as possible. This will transition you better into a freestanding handstand, plus you'll have the added bonus of not putting holes in your wall.
Make sure your core is engaged, your elbows are straight, and you're pressing hard into the ground. Press yourself away from the floor so that your shoulders protract (extend). To help visualize this, imagine there's a big floppy penis right below your face and you want to get yourself as far from it as possible.
Pressing hard into your palms will put some much needed distance between you and that penis. If you want to get closer to that penis you can always bend your elbows, but good luck trying to hold that handstand.
When you first practice the kick up, start out in a "downward facing dog" and kick up against a wall. This will let you focus on a spot on the floor without getting disoriented from the up/down motion of trying to kick up from a standing position.

- Place palms shoulder-width apart.
- From downward dog, begin walking your feet forward towards your palms.
- Shift your weight into your palms and lift your back leg up towards the wall.
- Push down into the floor keeping your core engaged and your elbows straight.
- Find the wall with the leg that's kicking up and bring your other leg to meet it.
The Press
Once you've kicked up, it's time to straighten yourself out against the wall. Do a "stacked" handstand instead of an arched handstand. It's easier on your lower back and allows for better core engagement. Here's a photo of the arched handstand vs. the stacked handstand:

Once your butt and legs are against the wall, use these cues to find balance:
- Press down firmly through the palms, keeping the elbows straight.
- Pull your belly button towards your spine to engage your core.
- Point your toes up towards the ceiling.
Remove One Leg at a Time
You have officially found your center on the wall and are ready to start moving away from it. Begin by removing one leg from the wall. Once you find balance, slowly bring your other leg to meet the first.

At this point you're going to wobble back and forth a lot. Remember that the wall is behind you so don't freak out. Also, don't forget to press hard through the palms, keep your core engaged, and your elbows straight.
Once you start to control your kick up and can find balance away from the wall, start practicing your freestanding handstand. As you're learning your freestanding handstand, don't feel like a failure if you need to use the wall from time to time. The wall can even be used as a conditioning tool during longer holds to help strengthen your shoulders and core.
Getting Your Freestanding Handstand
One of the most important things to know before kicking up away from the wall is how to fall. If you kick up too hard and freeze in a panic things are going to go tits-up real quick. The easiest way to bail is to "cartwheel" out of the movement. It never hurts to practice a couple cartwheels before you kick up and try to stick your handstand.

Once you feel comfortable enough to bail, you can start kicking up. Do NOT think this is going to come quickly. You're going to have to kick up hundreds of times before you start to actually hold your freestanding handstand for a considerable amount of time.
The handstand is a skill movement, so technically you should practice this after your warm-up and before your heavy lifting. Doing your handstands at the end of your workout works as well so long as you consistently practice. Consistency is going to be key. This should be a daily practice if you're serious about learning the movement.

