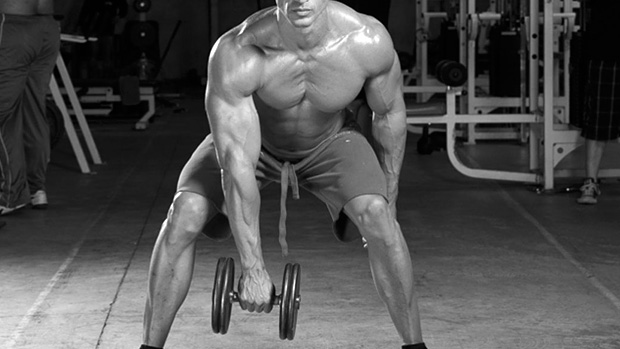
You want torture? You want pain? You want results?
Well, you'll get all these things if you apply these brand new violent
variations to your training program. In this fourth installment of the
series, I'll present you with 6 new techniques/exercises that you
can throw into your exercise toolbox.
But I don't want to bore you to death with some unnecessary chatter;
after all this is Violent Variations!
 |
Variety in exercises, life, or Pez dispensers is always nice.
1. Massive Shoulders and Torso With Overload Work
One very important stimulus for muscle growth is intramuscular tension.
This factor is highly correlated with the amount of force that a muscle
must produce.
In simple terms, the more force a muscle must produce, the harder it
must contract; the harder it must contract, the more intramuscular tension
is present in the muscle. The more intramuscular tension you have, the
greater growth potential you have...provided that this tension can be
maintained for a sufficient length of time.
Overload training (lifting, holding or lowering a weight that is heavier
than what you can normally lift in a regular exercise) is thus a very
powerful tool when it comes to stimulating growth and strength gains.
Variations of this type of training are supramaximal supports, heavy
partials, and functional isometrics. I'll specifically show you
how to use these methods to build huge shoulders (as shoulders seem to
respond exceptionally well to this type of training).
1A) Supramaximal Supports
This method consists of holding overhead, in the locked-elbows position,
a weight that's heavier than your max overhead lift. To bring the
weight into position you actually use your legs, not your arms.
 |
Put the bar
in the power rack. It should rest near the top of your head or a few
inches above it. Grab onto the bar as if you were pressing the bar, but
instead of trying to press it, squat under it (or more precisely, you
quarter-squat under it). From that quarter squat position, straighten
your arms and lock your elbows. Then stand up, keeping the bar locked
overhead.
Hold the position as long as you can. It's very important to try
to ''touch the ceiling'' with the bar, meaning that when you're
in the lockout position, you don't merely passively hold the weight
overhead. Instead, you're actually flexing your shoulders, arms
and traps as hard as you can.
When training for hypertrophy you want to select a weight that you can
hold overhead for around 15-20 seconds (work up to the max weight you
can handle for that time frame). If strength is your goal, shoot for
the max weight you can handle for 6 to 12 seconds.
This exercise will be very effective at building the delts, triceps,
traps, and also the serratus. Furthermore, it'll contribute to giving
you a ''powerful torso'' look.
Since you're handling an extreme load, you'll also develop
the CNS' capacity to recruit the fast-twitch muscle fibers. This means
that this exercise (and the other 2 methods presented) will make every
other shoulder exercise you'll do more effective by priming your nervous
system to recruit those high threshold motor units.
1B) Functional Isometric Overhead Press
I've talked extensively about functional isometrics in the past
because it works! And it's probably one of my favorite training
methods for both making huge strides in strength gains and priming the
body to respond better to hypertrophy training.
The functional isometric overhead routine is adapted from Bill March
(an old-time Olympic lifter). I used his approach many times with myself
and clients with great success.
First a little recap about how to perform functional isometrics.
• You need two sets of safety pins in the
power rack.
• The pins are set 2-3'' appart.
• The bar is placed on the first (lowest)
set of safety pins.
• You load the bar.
• You press (or pull) the bar until it reaches
the second (highest) set of safety pins.
• At that point you press (or pull) against
the pins as hard as humanly possible for the prescribed time frame.
• You add weight until you reach a weight
that you can't hold against the pins for the prescribed time period.
Isometrics (including functional isos) increase strength mostly at the
angle being trained. There's actually a 15-20 degrees carryover,
which means that with a movement like the overhead press, you'll need
to perform functional isometrics from three difference positions to gain
strength over the full range of motion.
Those positions are:
1) 2-3'' from the start/from the clavicle.
2) At the midrange point.
3) 1-2'' short of the lockout.
Those positions are shown below:
 |
 |
 |
|
If hypertrophy is your goal, you'll want to work up to the maximum
weight you can hold against the pins for 10-15 seconds and if you're
shooting for strength, work up to the max load you can handle for 5-8
seconds.
1C) Three Stages Press
This technique was used by quite a few Olympic lifters to build huge
shoulders and great overhead strength. Pierre Roy (former Canadian National
Coach) used it with a lot of top athletes and I've managed to employ
it with equal success.
It's actually quite a simple technique: you start your overhead
work ''set'' with the standing military press. This means pressing the
bar stritctly overhead with no momentum or cheating. The torso is kept
perfectly straight. When you complete the prescribed number of reps (which
should coincide with failure to complete more strict presses), you rest
for 30-45 seconds and then grab the bar again.
 |
 |
However, you'll now move on to push presses. Push presses are basically
military presses done with a little bit of cheating. You start each rep
with a ''slight'' leg drive, just enough to get the bar moving, but the
arms and shoulders still do most of the work. You perform as many reps
as you can in good form and rest for another 30-45 seconds.
When this rest period is completed you grab the bar a third time.
 |
 |
 |
|
For the third portion of your ''set'' you'll move on to push jerks.
Push jerks are similar to push presses but instead of using only a slight
leg drive, you use an all out leg explosion!
You basically try to throw the bar up in the air by pushing hard with
both the legs and arms at the same time. Perform as many good push jerks
as you can, but don't let your form deteriorate as the risk of injury
would be too high.
 |
 |
 |
 |
This completes one set. Depending on the number of exercises
you have on that day you should perform anywhere from 3 to 6 of those
sets. In fact this ''exercise'' alone can be a great shoulder workout.
If that's the case (it's your only exercise), you can perform up
to 8-9 sets.
2) Functionally Correct DB Flies
When it comes to flies, most peoples don't make the most out of
the exercise. Granted, they'll never be a powerful mass-builder
like the heavy pressing movements, but for those who are triceps or shoulder
dominant, flies and similar movements are often the only way to get decent
pectoral development.
If you fit the aforementioned category, you might as well do everything
right to maximize the benefits of the movement!
Here's what I recommend:
a.) Perform flies preferably on a decline angle. When using the decline
you increase the ''effective range of motion'' (EROM) of the exercise.
With flat movements, only the first half of the exercise actually loads
the pecs properly. Once you pass the midway point of the exercise you're
pretty much doing an unloaded movement because you're exerting strength inwards (horizontally)
instead of upwards (vertically).
With DB (and other free-weights) the source of resistance is always
vertical because of gravity, so when the vertical component is dropped
from the movements, muscle loading drastically decreases.
While the decline angle isn't perfect, it does increase the EROM
by about 30%, which is substantial when optimal results are of prime
importance.
b.) Don't neglect the second function of the pectorals in the fly
movement. We all know the primary function of the pecs during the
fly exercise – bringing the arms toward the midline of the body. This
is called a transverse shoulder flexion. When you're doing any type
of flies such as the pec deck or cross-overs, you're pretty much
performing this function.
However, there's a second function we shouldn't forget – internal
shoulder rotation. This occurs when you're rotating the arm along
its axis; turning the upper arm inward.
To work this second function, you should start the fly (from the bottom
or stretched position) with the palms up and as you lift the weights
you rotate your arms inwards so that at the end of the lifting
motion your thumbs are facing each other.
 |
 |
It's very important to:
• Initiate the inward rotation as soon as you start to lift the
dumbbells (remember that even on a decline, the muscle is only
"loaded" during the first 2/3 or 3/4 of the movement.
• When you rotate, actively focus on squeezing
the chest as hard as you can; don't just passively rotate inward.
c.) The muscle you stretch the most is the muscle you recruit the most.
If you want to maximize pectoral recruitment during flies, you must feel
the deeper stretch in the chest, not in the deltoids or biceps. To do
so you might have to play with the angle/pattern of the movement.
For example, if you feel the stretch more in your biceps, you'll
need to shorten the lever by bending the elbows more during the lowering
portion of the movement. In other words, instead of setting your elbow
angle at 135 degrees in the bottom position you might shoot for 110 or
even 90 degrees... whatever it takes to stop feeling the stretch in your
biceps and put in on your pecs.
If you feel the stretch more in your shoulders you might want to lower
the dumbbells a bit more toward your hips and a bit less toward your
head.
There's no universal perfect form, just a perfect form for you.
d.) Start the eccentric portion with a pre-contracted position. This
means never relaxing the pecs for even one second during the set. To
do so you'll have to activate the pectorals by squeezing in at the
top while pushing toward the ceiling at the same time. Why? Because the
last 1/3 or 1/4 of the movement is essentially unloaded. If you want
to maintain a certain muscle tension you must make a voluntary effort
to contract that muscle.
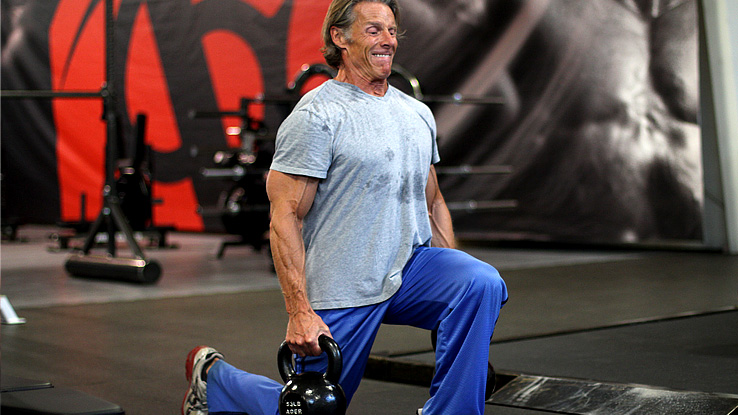
3. Get More Hops With Drop Step Ups!
This exercise is one of the most effective exercises to increase speed
and vertical jumping. It's called either a drop step-up or a plyometric
lunge. It's basically a static lunge where there's a powerful
activation of the myotatic reflex just prior to the explosive concentric
phase. This is the principle behind plyometric work and we'll be
applying it to the static lunge.
The movement is fairly simple but it can be quite challenging!
• Start with both feet on a box. The height
of the box should be determined by your strength and training level.
A 6-8'' box might be enough for beginners and intermediates and advanced
athletes might work up to 16-18''.
• Hold a dumbbell in each hand, but use much
less weight then you normally might use for lunges. Individuals with
low strength levels might even need to do this movement using only
their bodyweight.
• From that starting position, step off the
box with one leg (the working leg... the opposite one stays on the
box). Aim to land with the leg far forward, the same ''split'' as you
would with a regular lunge.
• This is the tricky part: You must land directly
in the low position of the lunge (knee bent at 90 degrees). Do not
land high and then squat down. To make the most of this movement you
must really land in the 90-degree position.
 |
Correct Landing
• Immediately upon landing, explode back up unto
the box. The less time you spend on the ground, the better it is. I
would much rather have you reduce the ground contact time rather than
adding more weight. You're not merely pushing yourself back up onto
the box, you're literally jumping back toward the box!
4. The Mid-Back Blaster
At first I used this exercise extensively to prevent shoulder injuries
in athletes (it works on external rotation strength as well as scapular
stability/fixation), but something happened: I noticed that guys doing
this drill prior to every upper body workout started to show a significant
increase in mid-back (rhomboids, rear deltoids, middle and lower traps)
thickness.
Ever since that time I've been including this great movement not only
in athletic programs but in body composition/bodybuilding ones alike.
It is a four-phase movement:
1.) Start with the hips back, knees bent 90 degrees, back flat, head
in line with the spine. From that position you row the weight up with
the elbows pointing straight out. You row until the elbows are in line
with the shoulder joint.
2. From that position (elbows in line with the shoulder joint) you perform
an external rotation (upper arm rotating along the axis formed with the
elbow and shoulder).
3. From that position (shoulder externally rotated) you press over your
head at a 45-degree angle so that at the end of the movement the wrist,
elbow, shoulder and hips are aligned and form a 45-degree angle with
the floor.
4. From that finished position, return to the starting position by lowering
the arms straight down (while keeping the arms straight).
 |
Conclusion
Again, the objective of this series is to give you more tools. The more
tools you can use, the more chances you have to build the body you want.
It's not my intention to say that these exercises
are better than more ''conventional'' ones, but rather that when all
else fails, injecting some new variations – especially violent variations – in
your training is the best way to start to grow again.

