As I wrote in my previous article, Hamstrings Times Two, the hams are one of the most universally underdeveloped body parts. If you've followed the training advice in that article, then you're ready to move up to the next level - the level occupied by elite power athletes.
Tap In
Once you've hypertrophied the hamstrings with accumulation work, the best approach is to improve the neural drive of the newly enlarged cross-section. In this next phase, hamstrings are trained as part of the posterior chain, while the knee flexor role of the hams is set aside.
The Germans have great terminology that describes the methods used in this phase, but there's no English equivalent for it. I'll just call it the "maximal weights method." The maximal weights method is used to teach the body to tap into higher threshold motor units for explosive efforts.
Here are sample workouts that are to be cycled. You do workout one, recover, do workout two, recover, do workout three, recover, and then do workout four. Finally, you restart the cycle.
You start with high loads and lower velocity, and progressively move to faster movements over a shorter range of motion. This model is very well suited for short-term power sports like sprinting, pole vaulting, and long jump.
Workout #1
A. Snatch Deadlifts on Podium, Starting Position With Bands
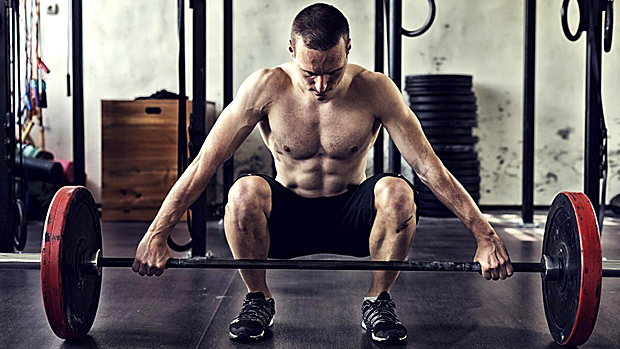
- Set-Up: Stand facing a barbell placed on the floor. Step up on the four-inch platform that's set under the bar to which a set of bands has been fastened. Squat down and grab the bar with a snatch-width grip, about 4 to 6 inches wider on each side than your shoulders.
For sets calling for three or more repetitions, you may want to use wrist straps. This prevents the isometric strength-endurance of your gripping muscles from being the limiting factor in overloading the posterior chain and your quadriceps.
- Ascent: Driving with legs first, raise the bar off the floor under control. The angle of your back to the floor should remain constant until the bar has reached at least mid-shin level. Make sure to keep a slight arch in the lower back throughout the movement. The bar should brush the body at all times. The elbows should be turned outward and remain locked throughout the movement.
- Descent: Reverse the process of the ascent, making sure that the chest is held high. Be sure to keep your lower back arched. Exhale throughout.
Notes
- There should be no kyphosis (hunchback or slumped shoulders) at any point during the movement.
- The bar should be glued to the body at all times, particularly in the start position where you should ensure that the bar makes contact with the shins.
- Don't raise the hips prematurely as it'll shift the emphasis to the glutes and away from the hamstrings.
Safety Concerns
- Don't hyperextend the cervical spine at any point.
- Don't bounce the bar off the ground.
- Don't allow the bar to leave contact with the body. The farther it is away from you, the more loading on the verterbral discs.
For illustration purposes, let's say your starting training weight goal is 200 kg. Your workout would look like this:
Warm-up
- 4 reps @ 80 kg, rest 10 seconds
- 4 reps @ 80 kg, rest 10 seconds
- 3 reps @ 120 kg, rest 30 seconds
- 2 reps @ 150 kg, rest 60 seconds
- 1 rep @ 160 kg, rest 120 seconds
- 1 rep @ 170 kg, rest 120 seconds
- 1 rep @ 180 kg, rest 180 seconds
- 1 rep @ 190 kg, rest 240 seconds
Workout
- 3 x 5 reps @ 200 kg, rest 240 seconds
- 3 x 3 reps @ 210 kg, rest 240 seconds
- 3 x 2 reps @ 220 kg, rest 240 seconds
The tempo should be 3OXO. That's a three second eccentric or lowering of the weight, no pause, an explosive concentric or lifting phase, and no pause at the top before the next rep begins.
The eccentric portion is long because of the long range of motion; it's very important to keep the lower back slightly arched and maintain the correct lowering mechanics. This is a grueling nine sets of work, so keep the rest of the workout to just a few sets of remedial work for the tibialis anterior and the posterior calf muscles.
Workout #2
Snatch Pull, Mid-Grip

The snatch pull is a deadlift to above the knees. Once the bar clears the knees, you accelerate to the top of the lift, shrugging your shoulders and coming up on your toes all at the same time. Basically, the technique is almost the same as the deadlift except for the more aggressive acceleration in the second pull. Use a grip mid-way between your snatch grip and your clean grip.
For illustration purposes, let's say your start weight is 110 kg.
Warm-up
- 4 reps @ 50 kg, rest 10 seconds
- 4 reps @ 50 kg, rest 10 seconds
- 3 reps @ 70 kg, rest 30 seconds
- 2 reps @ 85 kg, rest 60 seconds
- 1 rep @ 90 kg, rest 120 seconds
- 1 rep @ 95 kg, rest 120 seconds
- 1 rep @ 100 kg, rest 180 seconds
- 1 rep @ 115 kg, rest 240 seconds
Workout
- 5 reps @ 110 kg, rest 240 seconds
- 3 reps @ 120 kg, rest 240 seconds
- 2 reps @ 120 kg, rest 240 seconds
- 5 reps @ 112.5 kg, rest 240 seconds
- 3 reps @ 122.5 kg, rest 240 seconds
- 2 reps @ 125 kg, rest 240 seconds
The tempo should be 1OXO. The eccentric portion is just used to reset the bar under some control; no effort should be spent in that portion of the lift. Save your energy for the acceleration part.
The bar should be brought up at nipple height. Concentrate on rapid extension of the hips.
B. Glute-Ham Raises
The glute-ham raise is an excellent exercise for the lower back, glutes, and hamstrings. Also, if the bench you perform it on has a footplate, the exercise will also work the calves (and thus be called a glute-ham-gastroc raise).
- Starting Position: Lie facedown on a back extension bench and place your ankles under the ankle pads. Adjust your hips on the hip pad so that when you bend forward your back is perpendicular to the floor but not rounded.
- Action: Keeping your head in alignment with your spine and retracting your chin, lift your torso until your back is parallel to the floor. Continue the movement at this point by bending the knees (and pushing the balls of your feet against the footplate, if available) until your torso is almost perpendicular to the floor. Reverse the technique to return to the start.
- Breathing: Hold your breath, raise your torso, then exhale halfway down or at the finish.
- Tips: When the exercise becomes easier, hold a weight plate across your chest to increase the resistance. When this becomes easy, place a barbell across your upper back, holding it as you would when performing a squat. Do not, however, place weight plates on your head as this could result in injury. You'll also look goofy.


On this one, just do a straight 5 sets of 5 reps after doing 3 sets to get up to your work weight. The tempo should be 30X0 resting three minutes between sets.
Workout #3
Narrow Grip Power Snatch from Above Kneecap

[Editor's note: If you're unfamiliar with this lift, see our full article on it. However, keep in mind that Charles is recommending the lift be performed "from the knee" where the bar is placed on boxes or pulling platforms rather than the floor. He also suggests a narrow grip.]
For illustration purposes, let's say your training weight goal is 100 kg.
Warm-up
- 4 reps @ 40 kg, rest 10 seconds
- 4 reps @ 40 kg, rest 10 seconds
- 3 reps @ 60 kg, rest 30 seconds
- 2 reps @ 75 kg, rest 60 seconds
- 1 rep @ 80 kg, rest 120 seconds
- 1 rep @ 85 kg, rest 120 seconds
- 1 rep @ 90 kg, rest 180 seconds
- 1 rep @ 95 kg, rest 240 seconds
Workout
- 6 x 3 reps @ 100 kg, rest 240 seconds
The tempo should be 1OXO. The eccentric portion is just used to reset the bar under some control. Again, no effort should be spent in that portion of the lift. Save your energy for the acceleration.
The narrow grip forces you to give the bar more acceleration from the hamstrings as hip extensors. This is because you're moving the bar for a longer range of motion than you would with regular power snatches.
B. Standing Good Mornings

Make sure that the grip is wide on the bar and that you concentrate on hip action. Do 10 sets of 3 with a 2OX0 tempo. The first three warm-up sets should get you to about 80% of your work weight. Since you've just done the power snatches, warm-up will be a cinch, but since the pattern is slightly different, I'd still take three sets to attain the work weight.
So again, for simplicity, let's assume you'll use 100 kg for this exercise (you will in fact use far more, but to keep the math simple, I'll still use 100 kg). So the workload would look like this.
- 3 reps @ 60 kg, rest 120 seconds
- 3 reps @ 75 kg, rest 120 seconds
- 3 reps @ 90 kg, rest 120 seconds
- 3 reps @ 100 kg, rest 180 seconds
- 3 reps @ 100 kg, rest 180 seconds
- 3 reps @ 100 kg, rest 180 seconds
- 3 reps @ 100 kg, rest 180 seconds
- 3 reps @ 100 kg, rest 180 seconds
- 3 reps @ 100 kg, rest 180 seconds
- 3 reps @ 100 kg, rest 180 seconds
That's it for workout three. It's not the type of workout where you drag your ass out of the gym; it actually primes the nervous system.
Workout #4
A. Lumberjacks
This is a great exercise I learned from Pierre Roy that trains the posterior chain for explosive movements. I know one Canadian weightlifter who had knee problems that prevented him from squatting for a period of time. Concentrating on lumberjacks instead, he was able to snatch 160 kg without squatting after a short period.
Ideally, this exercise is performed with a special device created by Roy. Basically, it's composed of the sleeve of an Olympic lifting bar. The overall length is cut down to roughly 10 inches, then a notch is cut into the flat end of the thick inner end piece of the sleeve. A standard V-grip handle is placed into the notch and welded in place. It has the advantage of being plate loadable and extremely safe.
Art McDermott, Director of the Boston Poliquin Performance Center, describes the actual lift as such:
"The lift itself can best be described as a cross between a Westside Barbell style pull-through and a power snatch. This exercise has been given the unique name 'lumberjacks' because of the distinctive arm movement. The movement starts with a preliminary swing out in front of the athlete and then a long back swing between the legs. The spine remains straight and the back arched. The shortened loading post of the implement allows for a free swing between the legs without much fear of striking the ground.
The athlete is now bent forward at the waist, arms as far back between the legs as possible, with the back parallel to the ground. The elbows should be roughly even with the inside of the thighs in this deep position.
From the bottom position, the athlete pulls on the handles in much the same way as seen in any Olympic lift, that is, driving forward forcefully with the hips and shrugging the shoulders. As the implement moves forward, the athlete drops under the load in exactly the same fashion as the catch in an Olympic lift.
The focus is on an explosive hips drive and powerful shoulder shrug as the load swings forward with straight arms. The finish position is unique from actual Olympic lifting in that the load is stopped at roughly an 80-degree angle in front of the athlete's head."
On this exercise, I want you to do 8 sets of 2 with a load that would be hard to do for 6 reps. The key here is acceleration. Rest three minutes between sets so that the velocity of each set is kept high.


B. Sled Pull-Through
This exercise is another Louie Simmons movement. It's an outstanding exercise for developing explosive starts by focusing on the hips and lower back from a dead stop.
Stand facing away from the implement, holding one handle per hand. The athlete should straddle the straps. Bend forward at the waist until the trunk is parallel to the ground, keeping a slight arch in the lower back.
From this position, forcefully stand upright by firing the hips through to full extension. Don't use the biceps and/or deltoids as primary movers here. The hands should remain in contact with the body at the finish. Doing 6 sets of 6 reps, with 10 seconds between reps to reset will do the trick. Again, rest three minutes between sets.
Note: Make sure to have someone between the athlete and the sled to decelerate it as it comes near the ankles, particularly during warm-ups. Once the training weight has been selected correctly, this shouldn't be a problem and the sled will stop short of the ankles at the end of the pull-through.
Program Overview
The program uses initially high force, low velocity movements and moves gradually to high velocity movements with lower forces involved. Do workouts one, two, three, and four in this sequence, waiting five days before you work out your hamstrings again. Then, restart the cycle for another three repeats.
What you'll find upon returning to workout one is that the loads feel ridiculously light. The same thing will happen with each succeeding workout. In other words, even for workout four you'll find that there will be a startling difference in the poundages used in the first and fourth cycle.
Another thing that athletes like about this system of periodization is that every workout is different from different standpoints: velocity used, point of overload in the strength curve, percentage of loads, and the continuum of qualities worked along the speed-strength axis.
Pay more attention than usual to warm-ups and enjoy some great gains in explosive strength!


