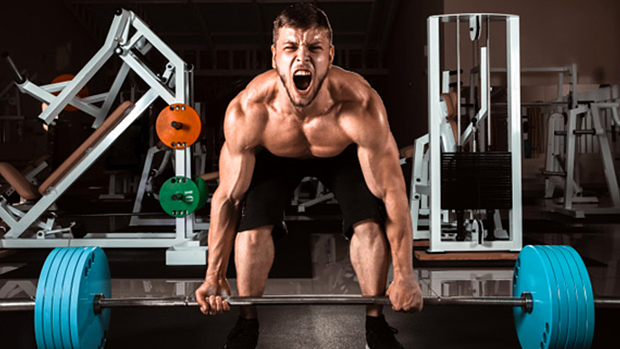
Let's face it, if I gave you the choice of either growing bigger muscles, or getting bigger and stronger, you'd choose the latter. Lucky for you, an essential component of getting bigger muscles is getting stronger. This is a universal law of training no matter what type of program you follow.
Now, let's take that thought process a step further. Since your goal is to get stronger and bigger, what exercise do you think would be most beneficial to add as much mass as possible?
The deadlift, of course!
Based on the feedback I've received over the years from T-Nation readers, it seems that the majority of guys have a max deadlift in the 300-400 pound range. Of course, there are outliers, but this pretty much hits the fat portion of the bell curve. At that level of strength, I can boost it around 40 pounds in just six weeks.
Sound cool? I certainly hope so because I'm here to outline one tried and true method that will boost your deadlift or squat strength fast. And you better believe it will also add slabs of muscle to your frame!
Progressive Movement Training (PMT)
Decades before steroids and high-tech lifting gear, Paul Anderson was discovering some of the most effective strength training tricks known to man. He was a genius and forerunner when it came to developing strength, and he had a 1200-pound squat to prove it.
One of Anderson's most revered methods is Progressive Movement Training (PMT). It consists of lifting a supramaximal load through your strongest range of motion and increasing the range of motion over time. For the record, a supramaximal load is a weight that's too heavy to lift through a full range of motion.
Here's a simple example. Let's say your one-repetition max deadlift is 315 pounds. If I threw another 100 pounds on the bar you could probably just deadlift the supramaximal load a few inches below lockout. It'd be tough, for sure, but you already know that building strength and muscle takes effort.
After the session you'd rest a few days and repeat the drill. The neurological enhancement from overloading your tendons, ligaments and muscles would allow you to lower the 415 pounds an extra inch or two due to the carryover of strength to greater joint angles. You'd continue with this plan until you could achieve a full deadlift to the floor.
That's PMT, in a nutshell.
Making It Work For You
Since there were no power racks at the time, Paul and his mentors had to compromise. They would stand in a hole and deadlift. Over time they'd fill the hole a few inches until they were standing at ground level. This movement progression is akin to lowering the pins on the power rack. Thankfully, the movement progression is much easier for us since we actually have a power rack. No shovel required.
The trick to getting this technique right is to not overwhelm your system with the first few workouts. The load should be heavier than you could lift through a full range of motion, but it shouldn't be devastating. Challenging but doable, that's the key.
Instinctively you might assume that lifting through the partial range of motion with just one or two reps will suffice. It won't. You need as many reps as possible to get the job done. The more you practice a lift, the better you get at it. My colleague, Pavel Tsatsouline, calls this greasing the groove. A neuroscientist would say you're training the cerebellum, a complex area of your brain that coordinates complex movements. Whatever you call it, the more you practice a lift the stronger you'll get. And the stronger you get, the more muscle you'll add, assuming the volume is sufficient.
As a rule of thumb, the shorter the range of motion, the more reps you need to boost strength. As you lengthen the range of motion, shave off reps to avoid burning out your system. Also, we're trying to boost your 1RM here, not your 10RM.
PMT works best with the deadlift, but the squat is a close second. Many lifters have successfully used PMT for the bench press, but it's not something I recommend unless you're a competitive powerlifter. So stick to the deadlift first, or the squat if you're built for it.
- Short ← ROM → Long
- High ← REPS → Low
There's no better way to boost your deadlift in record time than with PMT. However, there are four key points you need to understand to make it work.
1 – Use plates with the power rack
First, it's best to have access to a power rack that has holes that are only an inch or two apart. Unfortunately, most gyms have power racks with holes that mandate an extra three inches of range of motion. In most cases this is too big of a jump. But I've found a way around this shortcoming.
Start with the pins set 2-3 inches below lockout. For the next workout, stand on top of two 45-pound plates (one plate under each foot) with the pins set to the same position. This allows you to only increase your range of motion about half the distance of the pin holes. For the third workout, drop the pins one position and don't stand on the plates. For the fourth workout, stand on the plates with the pins set in the same position as workout #3. For the fifth workout, drop the pins, and don't stand on the plates. And so on.
2 – Add 10% to your full range of motion 1RM
You'll probably be scratching your head when you read through the following parameters. For the first workout you'll be performing 6 reps with 110% of your one-repetition maximum (1RM). How's that possible? Because the 110% is for your full range of motion.
Don't fret, you should be able to lift this load six times when the range of motion is shortened to just a few inches. If you can't pull six reps, you went too heavy. Remove 10 pounds for your second set.
For example, let's say your full range of motion 1RM for the deadlift is 405 pounds. You'll add 40 pounds to the bar and set the pins so you're only training the top 2-3 inches of the lift. Knock out two sets of six reps and your deadlift or squat training is finished. Follow it up with a handful of upper body lifts and you're good to go.
3 – No shoes allowed
You should train without shoes. In fact, all of my clients now train sans sneakers. Here are some reasons why.
First, modern tennis shoes typically have cushioning that lifts your heel slightly. This creates ankle dysfunction by diminishing ankle dorsiflexion due to a shortening of your soleus. If your ankles can't dorsiflex to a normal range of motion, your knees, hips and low back will eventually feel the pain.
Second, cushiony shoes alter the muscle recruitment pattern and decrease the transmission of force between your feet and hips.
Third, you'll enhance ankle stability strength by training barefoot. I suppose you could use Chuck Taylors, Birkenstock sandles, or ballet slippers, but why? Just slip off your shoes for each set and you'll reap the benefits of better ankle, knee, and low back health while also boosting your strength.
If your gym insists on shoes, you can always wear these. Otherwise, bare is best.
4 – Stretch your hip flexors and activate your glutes
Part of excelling at the deadlift requires strong glute activation. When your glutes fire optimally it boosts your strength and protects your low back and hamstrings. However, as the great Dr. Stuart McGill likes to say, many people suffer from gluteal amnesia. Part of the problem are tight hip flexors that don't allow you to fully lock out (extend) your hips.
There are two drills I like to use to prepare my clients for deadlifts. The first is a hip flexor stretch. Hold the following position for 15-20 seconds on each side. Repeat once more. This will free up hip extension.

The second drill will enhance nerve transmission to your glutes. Stand with your feet slightly wider than shoulder width. Squeeze your glutes together as hard as possible so the anterior portion of your pelvic bone tilts up. Hold this contracted position for five seconds. Squeeze to the point where you're trying to make your glutes cramp. Make a fist with each hand to develop a stronger glute contraction.
Now your hips and low back are ready to pull some big weights!
Progressive Movement Training for the Deadlift or Squat
Here's a sample strength-boosting plan using the PMT method.
- Frequency: twice per week (Monday and Thursday, for example).
- Exercise: deadlift or squat
- Load: 110% of your full range of motion 1RM
- Rest: 2-3 minutes between each set of deadlifts
- Week 1: 2x6 with pins set 2-3 inches below lockout *
- Week 2: 2x5 standing on plates *
- Week 3: 3x4 with pins set to next lowest position
- Week 4: 2x3 standing on plates
- Week 5: 3x2 with pins set to next lowest position
- Week 6: test your 1RM at the end of the week * *
* Use wrist straps if needed.
* * Assuming you follow a Monday/Thursday training plan, your last workout will be on Thursday of week 5. Test your 1RM for the deadlift or squat the following Saturday or Sunday on week 6. This allows 8-9 days of rest for full recovery.
For your upper body movements, shoot for 15-25 reps with a load you could lift 6-8 times while fresh. Ideally you'll choose one upper body pushing and pulling movement for each workout, but the exercise choices are up to you.
Pull-ups and chins are great upper body exercises because stronger lats will boost your deadlift or squat. This is due to the fascial cross connection between your lats and glutes: they're constantly pulling on each other. Remember though, this phase is for boosting your deadlift, so keep most of your energy focused on it.
It goes without saying that this type of training is very intense, but I'm going to say it anyway: this type of training is very intense.
Keep your supplemental exercise to a minimum, and don't repeat this phase in an effort to double-up your results: it won't work. This type of training should be limited to three times per year, with at least three months of rest between each phase.
Final Words
This is one of the fastest ways you'll ever use to add 10% to your squat or deadlift. Keep in mind, if your 1RM is 405 pounds, that's a 40-pound increase with just five weeks of training!

