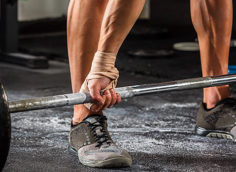
What separates a beginner from an advanced lifter? Apart from experience, advanced lifters need more training intensity, variety, and specificity to make continued gains.
At Performance U, when we want to spark new growth in an advanced athlete or even just keep them interested in their training, we use Triple Threat protocols.
- A Triple Threat protocol is a high volume system composed of three exercises performed back-to-back as either a triple-drop set or as a giant set.
- If you're into the Eastern block or Westside stuff, you'd put these protocols into the "repetitive effort" category.
- Each of the three exercises in a Triple Threat set focuses on the same muscle group or movement pattern.
This article will offer a multitude of Triple Threat protocols that we've developed to hit the chest, back, shoulders, legs, and abs. If you'd rather classify your training as movement patterns, there are also Triple Threat protocols for pushing, pulling, hip hinging, and core.
Triple Threat protocols are a great way to:
- Add volume to your workout, which can increase hypertrophy.
- Get an insane muscle pump, which has been shown to increase muscle size due to cellular swelling.
- Add a new challenge to increase training variety and keep your workouts more interesting and fun.
- Get a great workout at-home or on the go, as each protocol uses little to no specialized equipment.
- Get an express workout! If you're short on time or just don't feel like spending too much time in the gym, a few Triple Threat sets will give you a great pump in little time.
There are three ways to use Triple Threat protocols:
- As part of a hypertrophy-focused program.
- As a burn-out or finisher.
- At the end of a lower volume strength or power-focused workout to help maintain muscle size.
Here's how to perform seven of the most popular Triple Threat protocols that we use with our athletes at Performance U.
As you're about to see, Triple Threat protocols come in a few different styles. I'll also explain the specific rationale used to design each protocol.
Rest Time between Triple Threat Protocols
Due to the high volume nature of the Triple Threat protocols, rest 2-4 minutes between sets.
Push-ups aren't new, but here's two ways to create a new training stimulus from this classic, battle-tested exercise.
Here's our basic Triple Threat push-up protocol:
Once we had athletes crushing that version, we developed this advanced version:
Both push-up protocols are based on the triple drop-set concept. They both begin with the most difficult push-up variation and progressively "work down" to the easiest version.
In other words, as you fatigue, the exercises become easier, allowing you to continue to crank out high-quality reps with less risk of injury.
There are two ways we adjust the exercises to make them progressively easier as you get tired:
- Reduce the weight load (take the plate off your back).
- Shorten the lever arm (elevating your hands), which gives you a greater mechanical advantage.
Tips
- We've used the basic Triple Threat push-up workout to help people achieve 100 push-ups, if that's their goal.
- You can alternate between the basic push-up Triple Threat and the advanced version to mix up your weekly workout volume and create an "undulating" effect. Although both protocols are higher volume, the advanced version is much less volume than the basic version due to the added weight plate.
- To create further training variety and minimize overloading certain tissues, we'll occasionally mix-up hand placement on the push-ups (wide, close, staggered, etc.).
- We go for max reps (technical failure) on each push-up.
- You can rest up to 15 seconds in transition between push-up variations.
- Perform 1-3 sets.
Pull-ups and chin-ups are awesome. Here's a killer pull-up/chin-up triple drop set (incorporating super bands) to make them even more awesome:
This is another example of a triple drop set. As you fatigue, you use a larger super-band, which provides greater assistance to help keep hammering out reps.
The upside to doing intense drop sets like this is that it guarantees you create overload and work the deeper (type IIAB) muscle fibers, which will rebuild, adapt, and come back bigger and stronger.
The downside is you must be careful not to use this type of high volume work too often, as you could end up overtraining and creating overuse injuries like tendonitis.
Tips
- You can mix up the grips. We like to start with wide-grip pull-ups (the most difficult), then add a small band and perform pull-ups with a normal width grip, finishing with chin-ups (palms facing you) using a larger band. Since underhand grip is the strongest, it's left for last.
- The band used on the third (final) set should be about double the strength of the previous band used in the middle of the set.
- Go for max reps (technical failure) on each pull-up/chin-up version.
- Rest up to 15 seconds in transition.
- Perform 2-4 sets.
To really blast the mid-back muscles, which are often weak and underdeveloped, grab a suspension trainer and go to town on this back blaster:
This is a giant set of three pulling variants, which train the mid-back muscle from the center out. Here's the breakdown of why we designed the protocol the way we did.
- We begin with Y pulls because it's the most difficult of the three movements, and the most difficult to perform correctly. Since it's the weakest of the three pulling movements used in this protocol, we have figure competitor Deanna Avery standing with a high body angle. Deanna also keeps her arms open in the shape of a "Y" (or V) to better match the line of action of the low traps.
- The second pulling movement is wide elbow rows, which we perform to hit the mid-traps, rhomboids, and rear-delts. The elbows are kept at a 90-degree angle to minimize biceps recruitment, which could take work away from the mid-backs muscles (we don't want that). Since we're using larger muscles than before, we can lengthen the lever arm (to add load) by moving the feet in (toward the anchor point of the suspension trainer) about one foot.
- The third and final movement, underhand grip rows, is the easiest and strongest movements to perform because you can bring your lats and biceps into the game. That's why we have you walk your feet in another foot or so closer to the anchor points, raising the load further by increasing the lever arm.
Tips
- You can try reversing the order, although we've found it doesn't work as well – the muscles that usually require the most attention, like the mid-trap and rhomboids, end up getting less overall work due to fatigue from the rows.
- There are plenty of great rowing exercises with machines, dumbbells, and barbells, etc., but the training options are more limited for the mid-back – another reason why they're placed first in this protocol.
- There's sort of an "accommodating resistance" factor that occurs when performing these pulling exercises with a suspension trainer. As you pull yourself up toward the handles, your body angle is decreasing, which shortens the lever arm.
- This makes each pull less difficult at the top, when the muscles are fully contracted. This fits well with our natural strength curves as a muscle tends to be strongest in its mid-range and weaker in the end (fully lengthened or fully contracted) ranges.
Our physique athletes use this protocol because it helps make their shoulders "pop." This protocol is also popular with our MMA fighters, boxers, and Muay Thai fighters as it helps them build the shoulder endurance to continually grapple and hold their arms up in "boxers guard" to protect their jaw.
The video above shows Big Mark Simon using a barbell. Nowadays we use two dumbbells to get this one done as it's easier on the shoulders and allows each person to move in a way that better matches their individual body mechanics. That said, it could certainly be done safely if you only have a barbell available.
- The first exercise in this Triple Threat protocol is a modified (shoulder-friendly) upright row, which hits the shoulders with a pulling action. To spare the shoulders, the weights are only raised to nipple level. Once there, the bar is pulled back a bit towards the body (not upward toward the sky) creating even less potential impingement stress on the shoulder.
- The second exercise is a basic overhead press, which gives a shoulder-dominant pushing action.
- The third exercise is an upper-dominant snatch, which is just a fluid combination of the first two exercises (the modified upright row and shoulder press), with a bit of help from the lower-body.
Note to the Olympic lifting elite: Before you pull your O-lifting elitist card and rip on Mark's snatch form, understand that the only thing this exercise has in common with a true Olympic lifting snatch is the name.
We're not trying to do an Olympic snatch. We're simply trying to bring in a small contribution from the hips and legs to help the shoulders work more. That's why it's an "upper-body dominant snatch."
"Minimal contribution" does not mean "zero contribution." We finish with this move because it allows you to use assistance from your lower body to enable your shoulders to keep working and accumulate more work volume, thereby overloading the shoulders.
Tips
- If you have shoulder issues, this protocol isn't for you.
- You can perform a unilateral version of the protocol using a single dumbbell.
- You can also try a version of this protocol using one kettelbell. Perform high pulls, followed by overhead presses, followed by snatches.
- A controlled eccentric lowering on the upper-body dominant snatch is encouraged.
- Perform 6-10 reps of each exercise.
- Do 2-4 sets.
This protocol helps develop full spectrum glute strength, which simply means that your glutes are very strong throughout the entire range of hip extension, not just in the specific range that you train most often – a common flaw in many dedicated lifters.
Here's Pro figure competitor Kate Grevey Blankenship showing how to perform the single-leg RDL Triple Threat like a boss:
This protocol has taken the benefits of the single-leg Romanian deadlift (RDL) one step further by manipulating the force vectors, which changes the point of maximal loading on the glutes to provide a more well-rounded glute workout.
The point of maximal loading (when the weight is heaviest because the lever arm is longest) when doing RDLs is when the torso is at 90 degrees from where the resistance is originating. Keep this in mind when reading.
- The first stage of the RDL Triple Threat loads the glutes more in the bottom range of the exercise.
- The second stage of the RDL Triple Threat loads the glutes more in the middle range.
- The third stage of the RDL Triple Threat loads the glutes more in the top range.
This protocol was inspired by a different variation I learned from my great friend Juan Carlos Santana.
We only use the stability ball for a limited number of exercises – this is one of them.
- The first movement, leg curls, is the toughest and most dynamic, so it's placed first in the sequence.
- The second movement, hip bridges, creates an isometric contraction of the hamstrings to hold the ball in place, while the glutes work primarily to raise and lower the hips.
- The third movement, straight-leg hip lifts, require the shortest range of motion, which is why they're placed last. Since the straight leg position actually lengthens the lever arm, an argument could be made that this movement should be placed second, before the bent-leg hip bridges.
We've tried it both ways and found either way works well. We often allow our clients to decide the order they'd like to perform the second and third moves.
This protocol also uses a stability ball. It also incorporates some loaded trunk (spine) flexion work, which is a controversial subject for many coaches and trainers.
At Performance U, we don't subscribe to the "no loaded flexion" exercises theory, which is why we're okay with using it for certain individuals who don't have existing back issues.
Still, if you're not comfortable with using loaded flexion, just substitute any core/abs (anti-trunk movement) exercise that you wish.
Weighted ball crunches use the abs from the top down (upper to lower). We also like the ball because it allows an eccentric lengthening of the abdominals on each rep. You won't force a muscle to become "shortened" if you're always using it through its full range of motion.
The pike is like the opposite of the crunches, contracting the abs from the bottom up.
The final exercise, stir the pot, covers the static stability aspect of the abdominals. We like to place the isometric at the end as isometrics are, well, boring. But if you go into them with the abs already fatigued from the first two actions, it takes less time to create a training effect.
Tips
- You can change the order of the series to create more training variety and prevent boredom.
- Use 6-10 reps on the weighted crunches and pikes.
- Use 6-10 circles in each direction on the stir the pots drill.
- Perform 2-4 sets.
Note: Keep the reps low (6-10) in flexion exercises to avoid racking up lots of repetitive flexion, which is risky. Just keep in mind that any joint can get overworked and worn down from too much abuse (i.e. excessive repetitions).
- If you feel there needs to be less reps in these protocols, then do less reps.
- If you'd rather use heavier loads, that's fine too.
- If you think using a different order than listed here would be better, go ahead and have it your way.
That's why we love these Triple Threat protocols – you can adjust them, tweak them, and make them into whatever you need to accomplish your goals.
Don't let your training grow stagnant and see your gains dry up along with it. Give these fun and effective Triple Threat protocols a shot.

