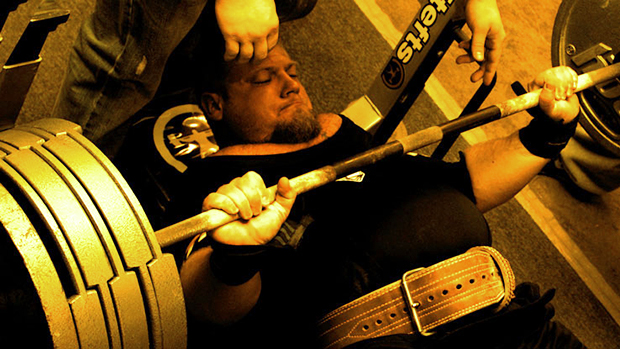
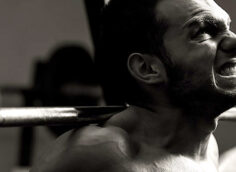
The ultimate marker of strength is the barbell bench press. But chances are, you're doing it very wrong. Ninety percent of all strength issues with the bench press have absolutely nothing to do with muscular weakness. It's all about technique. You teach a guy how to properly set up to press and he'll get stronger instantly.
If you want to bench heavy weight and blow past any sticking point, there's a position you absolutely must get your body into every time you bench. The key is tightness, and without this stable position, technique will crumble. I call this the "tight tucked" position — "tucked" referring to the fact the feet are pulled up so they're below the body, as opposed to out in front and to the sides.
Tight Tucked Position
1. Provides rock-solid stability to hold technique together.
2. Maximizes the mechanical advantage of the body's leverages.
3. Minimizes the distance the bar travels.
PART 1: The Setup
There are seven distinct steps to getting into the "tight tucked" position:
Step 1: Tuck your feet underneath you.
The bench press is a whole-body exercise. If you're just letting your legs hang out and simply lying on the bench, you're severely limiting how much you can press.
Step 2: Roll your chest up.
Imagine having a string that's hooked to the ceiling and connected to your sternum. You want to set your chest and keep it up. If it falls flat at any time during the lift, you're in trouble.
Step 3: Push your heels into the floor as you drive your traps into the bench.
Once your feet are tucked and your chest is up, inch your shoulders toward your feet while pulling your upper back and lats together and digging your heels into the floor.
Step 4: Grip the bar tight.
Squeeze the shit out of it. This will activate all the muscles in your hands, forearms, and triceps, and reinforce the tightness from your lower body and torso to the bar. You should be pretty damned uncomfortable. At this point, I’ll do a brief inspection of whomever I’m coaching. I'll wait until he's on the bench with his hands on the bar, and then I'll walk over and use my knee to push against his knee or torso. I want to see if he moves in any direction at all. If I can budge him, he's not ready to press the bar. You have to become one with the bench if you want to push heavy weight.
Step 5: Pull the bar – don't lift it – out of the J-hooks.
One of the biggest mistakes you can make is to try and lift the bar out of the rack. If you do that, your shoulder blades will rotate out and pull apart, and you'll lose all your tightness. Once you have the weight out, there's no way in hell you'll be able to put them back in position again. My solution is to have your spotter help you pull the bar out of the rack. Roll the bar forward, take a deep breath, fire your lats, and pull.
Now that the bar's out, you're ready to press, right? Not quite.
Step 6: Set the bar in lockout to compress your traps.
When someone just unracks the bar and starts pressing, I have to wonder just what in the hell he's thinking. That's like putting yourself into a freefall. It's a great way to knock out your teeth, too. Instead, set the bar. While you're holding it, count "one thousand one, one thousand two." And don't do shit. Waiting a few seconds will compress your elbows and traps and push you deeper into the bench.
With some guys you'll see a difference of maybe one to three inches that the bar will drop without them even bending their arms. All that compression just locks their body in tighter.
Step 7: Make sure everything is in line.
When the bar's in line with your wrist joints and forearms, then what you have is what us powerlifters call a straight line. And the strongest and shortest distance to move a heavy weight is through a straight line. Keeping the bar in line with your wrists and forearms will also save you undue stress to your wrists. If the bar rolls back in your hands, it's going to hurt like hell.
You are now officially in the "tight tucked" position, which means you're ready to move some serious weight.
PART 2: The Descent
There are four steps to lowering the bar:
Step 1: Break at the elbows to begin the descent.
Step 2: Tuck the elbows as the bar descends to the chest.
If you have your elbows flared out at the beginning, bodybuilding-style, you're going to screw up your shoulders pretty quickly. Keeping your elbows close also calls on the triceps to take over a fair amount of work.
Step 3: Flex your lats as the bar makes contact.
Flexing the lats and keeping your chest high will put your elbows in the perfect position to push heavy weight. Have a friend watch you bench from the side. If your elbows drift lower than the bench pad, you're putting excess stress on your joints, and significantly decreasing your power and speed on the way back up. Make sure your elbows come even with the pad.
Step 4: Hit the same spot on your chest every time.
If you stand up with your arms to your sides, wherever your elbows fall is about where the bar needs to hit. For most guys, that'll be the upper abdominals or lower portion of the chest. If you don't hit the same spot every time, you're going to waste a ton of energy and get out of your groove.
Here's one of my favorite tricks to ensure you nail this step: Rub some chalk in the middle of an empty bar, perform a few reps, and then look at your shirt to see where the lines are. If you've got one solid line, you're golden. But three separate lines means trouble. You're not allowed to add any extra weight until you hit the same spot each time.
PART 3: The Ascent
Just two steps to remember here:
Step 1: Feel as if you're pushing yourself away from the bar and into the bench.
This will dig your traps and lats into the bench even more, providing you with a solid base to push from. It's very important to keep your eyes on the bar. I've seen it so many times it's not funny.
When a guy's pressing and it gets hard, he'll always look toward his weak arm. Well, what the hell is that? He's just reinforcing the thought that his weak arm is going to fail. It's a subconscious thing. To break this bad habit, lift your head slightly and focusing on the middle of the bar as you lower it.
Step 2: Flare your elbows out and arc the bar back slightly toward your head.
While pushing the bar in a straight line is the shorter distance, and is what I used to suggest, I now believe it may put excess stress on the shoulders. I recommend pushing the bar back toward the rack instead. Regardless of how you press it back up, you have to remember one rule: The elbow has to stay in line with the bar. If your elbows are pointing to your feet, it means you're almost in a triceps-extension position. And if they're too close to your head, you'll be in a front-shoulder-raise position. Neither is conducive to locking out heavy weight.
As you lock the weight out, continue to flare your elbows, searching for the perfect bar position. For most guys, it'll be right above the eyes. If you've successfully locked it out, congratulations, you're now ready to rack it. If you're going for another rep, then every single repetition needs to feel the same. The form, the speed, everything.

